Instructions
ATMOS is simple to use. Just fill,
tamp and flip.
Here are a few things you should know before you start and
more information on how to improve your brew.

ATMOS is simple to use. Just fill,
tamp and flip.
Here are a few things you should know before you start and
more information on how to improve your brew.
Setup on a level, waterproof surface such as your kitchen benchtop to minimise the risk of stains and spills. Give everything a thorough rinse to ensure it is clean for your first brew.
Coffee
Your coffee grounds are
the most important ingredient, freshly roasted and ground beans will give the best
flavor.
We recommend an espresso grind (~350µm). A finer grind will
compact more closely, slowing the water's flow. Additionally a finer grind will have more
surface area for coffee extraction, resulting in more coffee goodness.
Note: Variations within grind size, or too coarse grind size, will increase the likelihood of channelling in your brew, resulting in uneven extraction.
Using a duel sifter like the KRUVE will help you ensure your grind is the consistent size you desire.
Water
Always use good
quality drinking water for brewing coffee.
The pH and mineral content of water is important, as different pH and minerals will change the extraction of different compounds of the coffee, which impacts the final flavor. For more info please check out The science of perfect water for coffee
Time
How long your brew
takes will depend mostly on the coarsness of your grind and amount of coffee. We recommend
aiming for 4+ hours, but your first brew might be quicker or slower.
Your cold drip will be stronger and more concentrated the longer the brew takes.
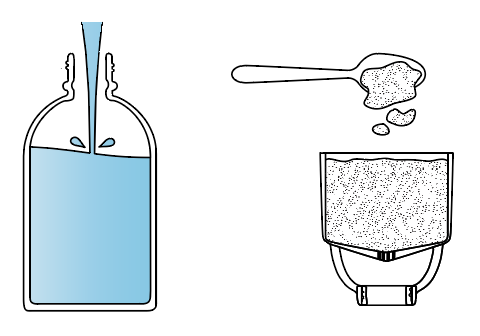
Fill one of the bottles with drinking water. (300ml)
Fill the basket with fresh espresso ground (~350µm) coffee. We recommend a starting dose of 44g of coffee.
We recommend measuring on a scale so you can the record exact amount of water and coffee used. Be sure to also record how long the brew takes and your tasting notes. We have a brew card available below for you to track your brew.
To help acheive an even coffee density throughout the basket, loosely fill the basket with coffee then give the basket a little giggle/tap to let the coffee gently settle and level out.
Wipe off any excess grounds from the rim, then press and lock the tamp into place.
If it's difficult to press down far enough to lock the tamp, less coffee is required.
If the tamp is not touching the coffee, more coffee is required.
Wet the grooves on the underside, to ensure the coffee flows to the centre.
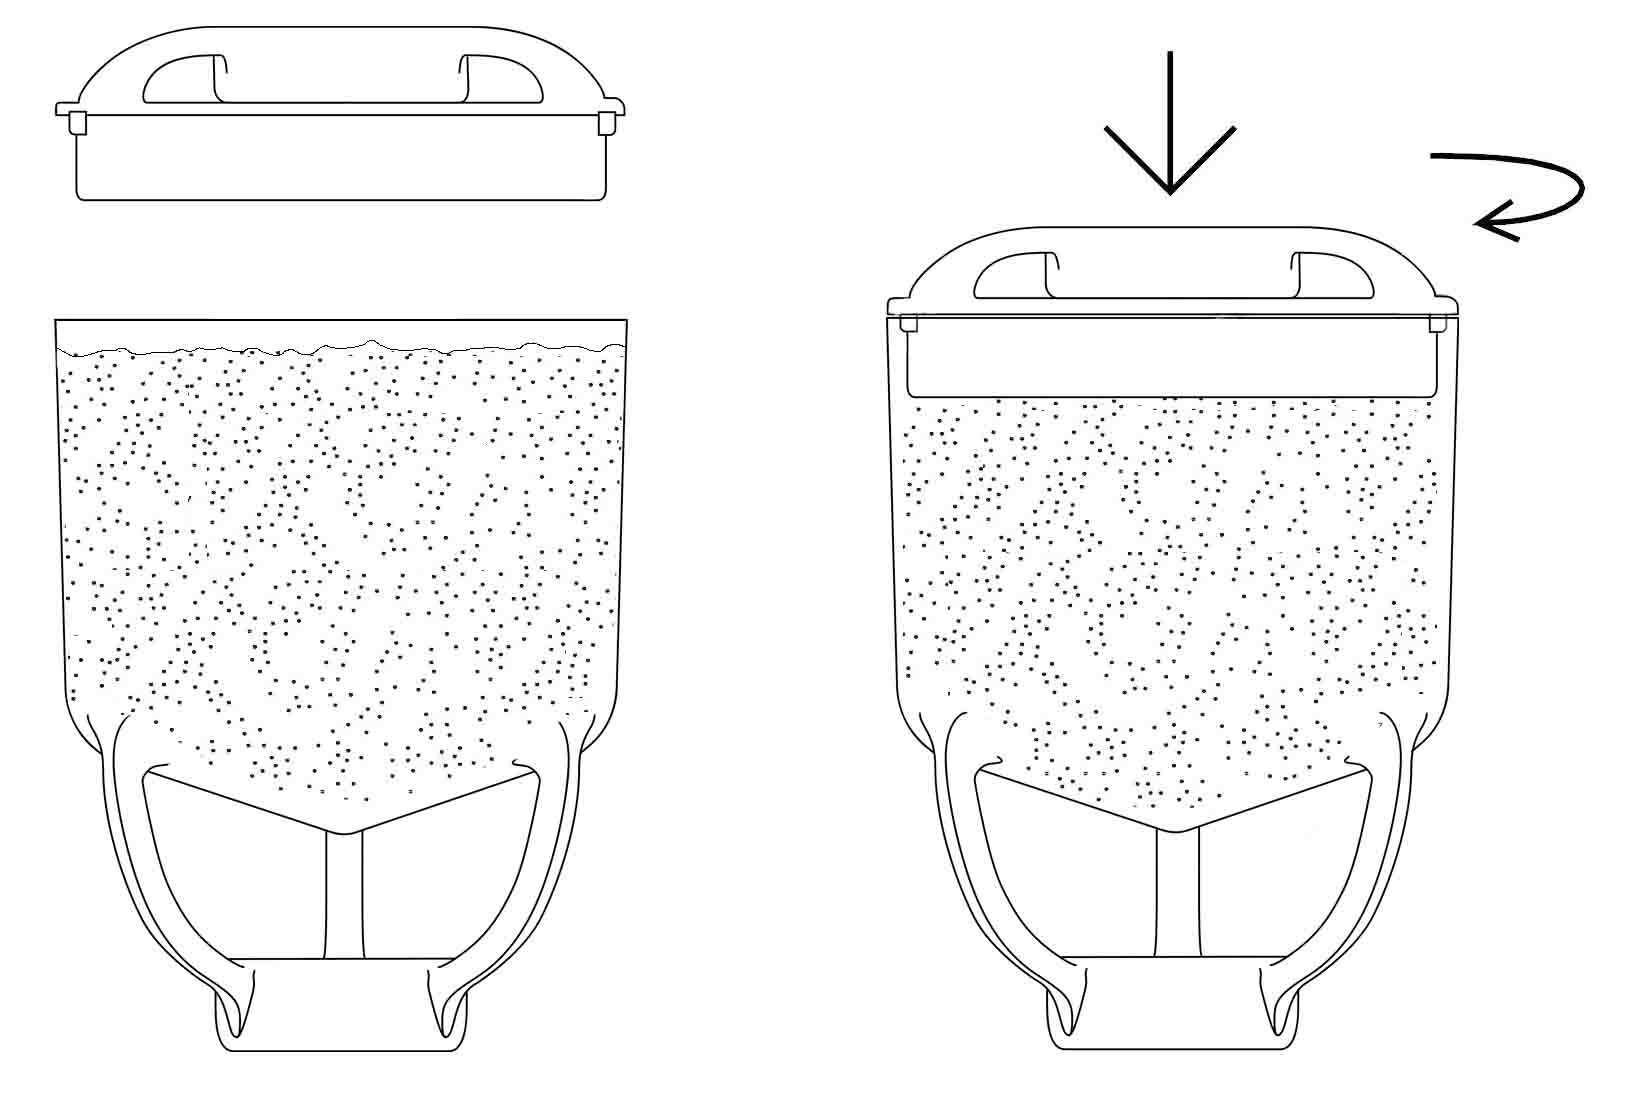
Screw the water bottle into the tamp and your empty bottle into the basket.
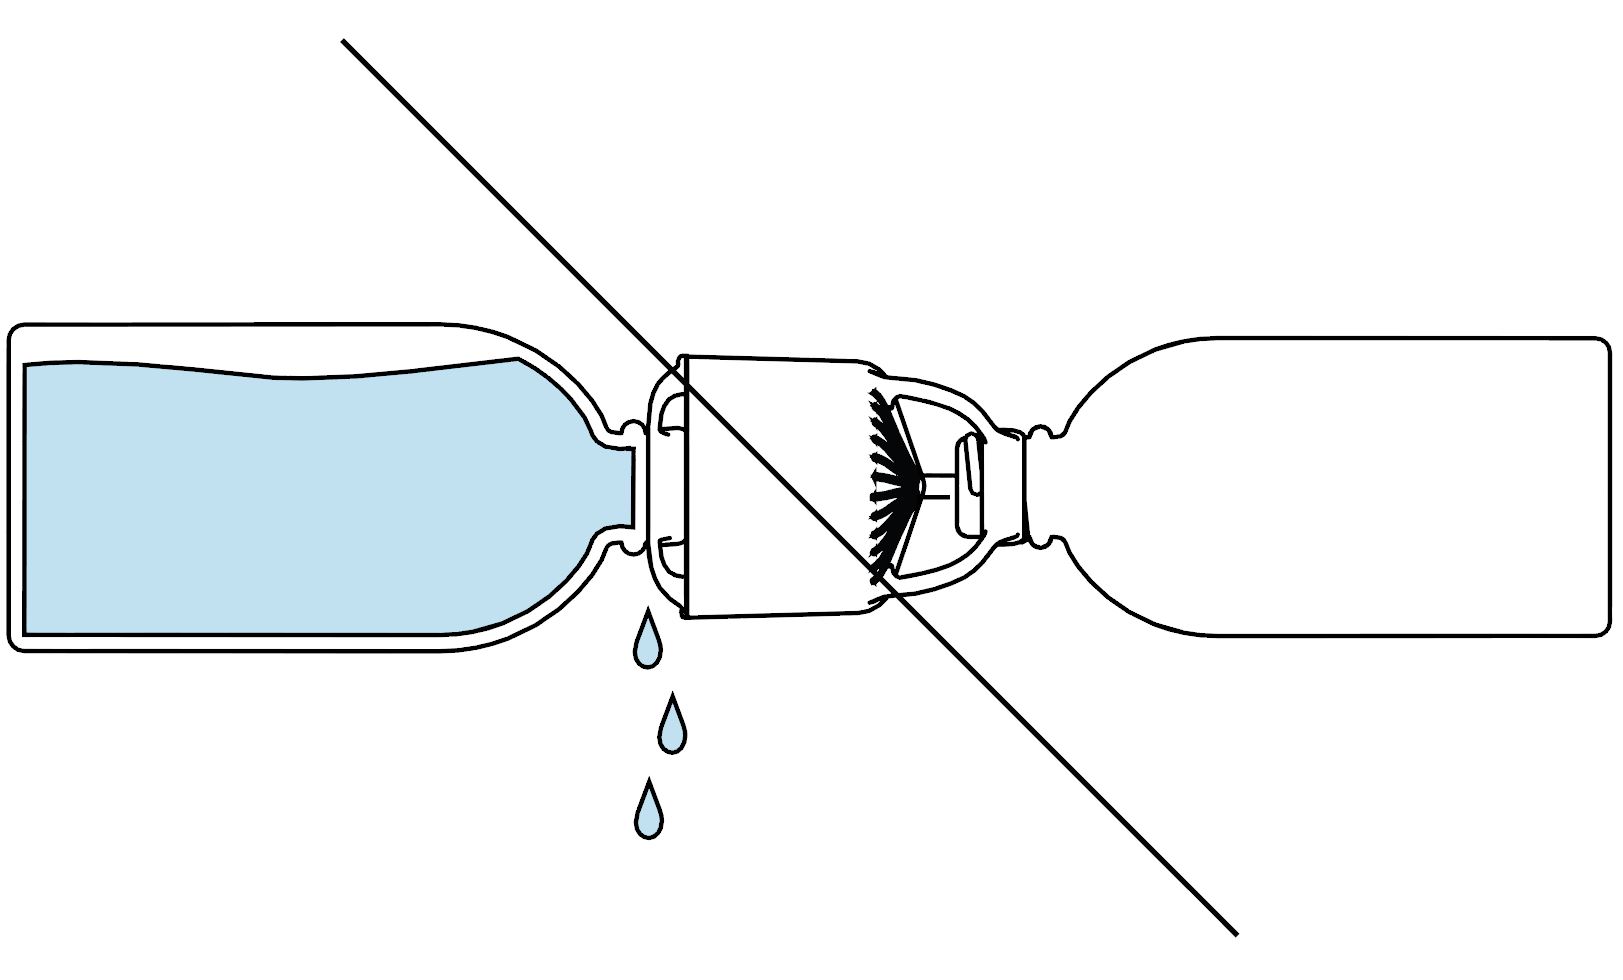
Before flipping ensure the ATMOS body has the groves pointing to the sky and the water bottle is connected to the the tamp.
Once assembled, flip in one fluid motion.
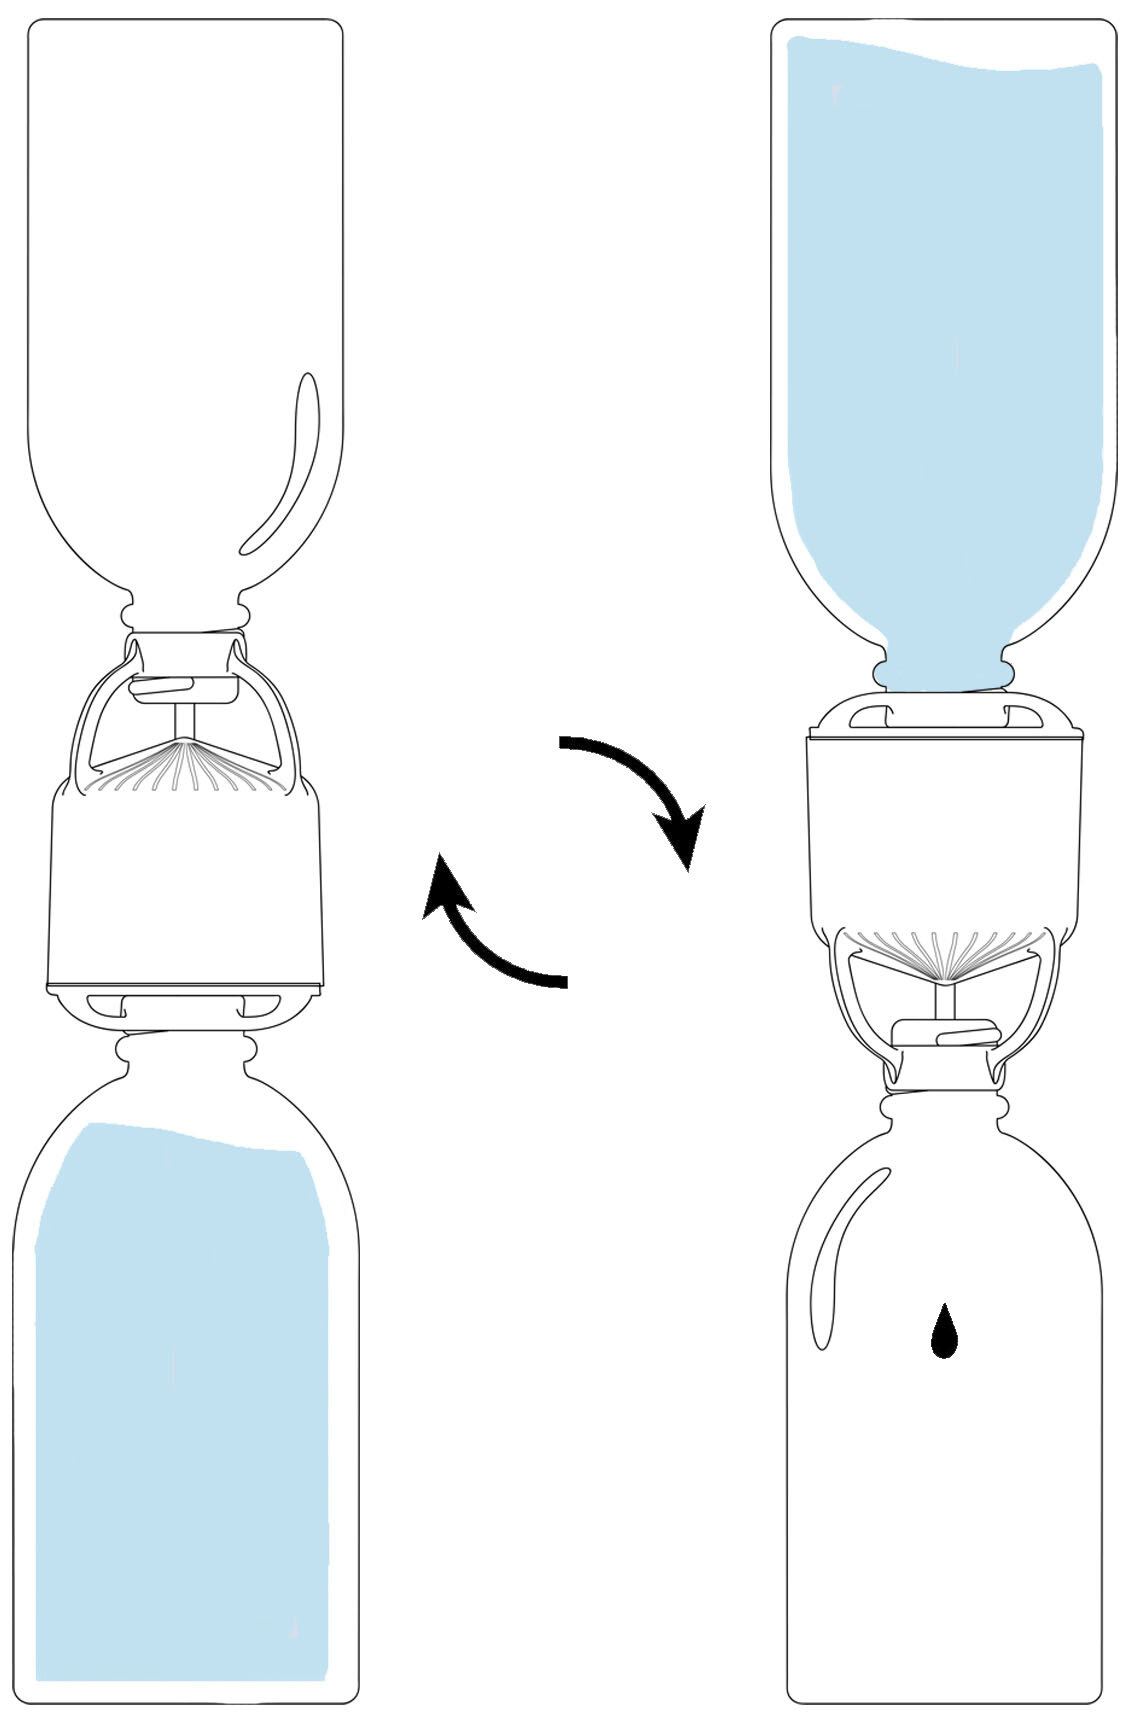
Try to flip it quickly & smoothly without holding horizontally.
Place in a stable and flat location for the duration of the brew.
It takes some time for the water to wet all of the coffee and start dripping, you should start to see first drips at ~30-60 mins.
If drips start much quicker or there is a very fast drip rate, this could indicate the water is channeling through the coffee rather than moving evenly. We recommend discarding this batch and starting again with a finer grind, ensuring an even coffee density when filling the basket. If a finer grind doesn’t change your results, try adding more coffee additionally.
If no drips have appeared after
1.5 hours, this could indicate the water is not able to flow through
the coffee. This is generally a result of too much coffee or there are
very fine coffee grounds clogging throughout. We recommend
discarding this batch and starting again with a
lesser amount of coffee and/or a more coarse grind, ensuring an even
coffee density when filling the basket.
Additionally you may need to clean out
any fines stuck in the filter.
Record the brew duration and tasting notes on your Brew Card. This is important so you can replicate your brew and see how changes you make impact your results.
It is best to change 1 thing at a time to help you easily identity how this impacts your brew results.
Addtionally you can inspect the spent grounds to check for any dry coffee or other indicators of channelling. This may look like the water has drilled holes in the coffee as it passes through.
If there is the presence of dry coffee or significant channelling, you may need to adjust your grind/amount of coffee and ensure even coffee density while filling the basket.
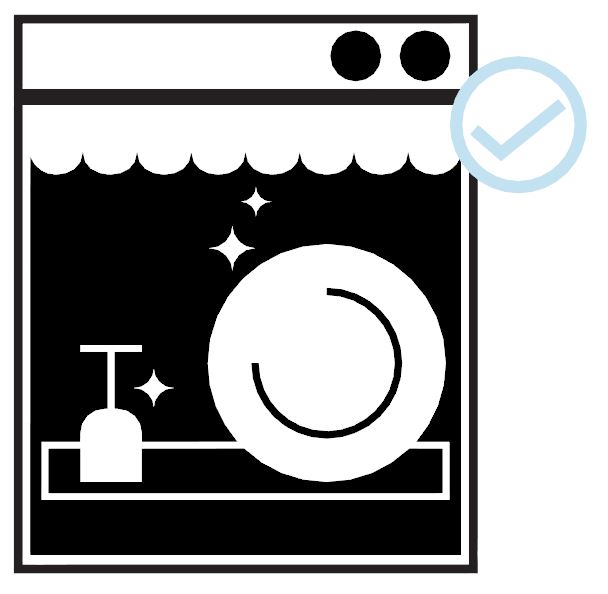
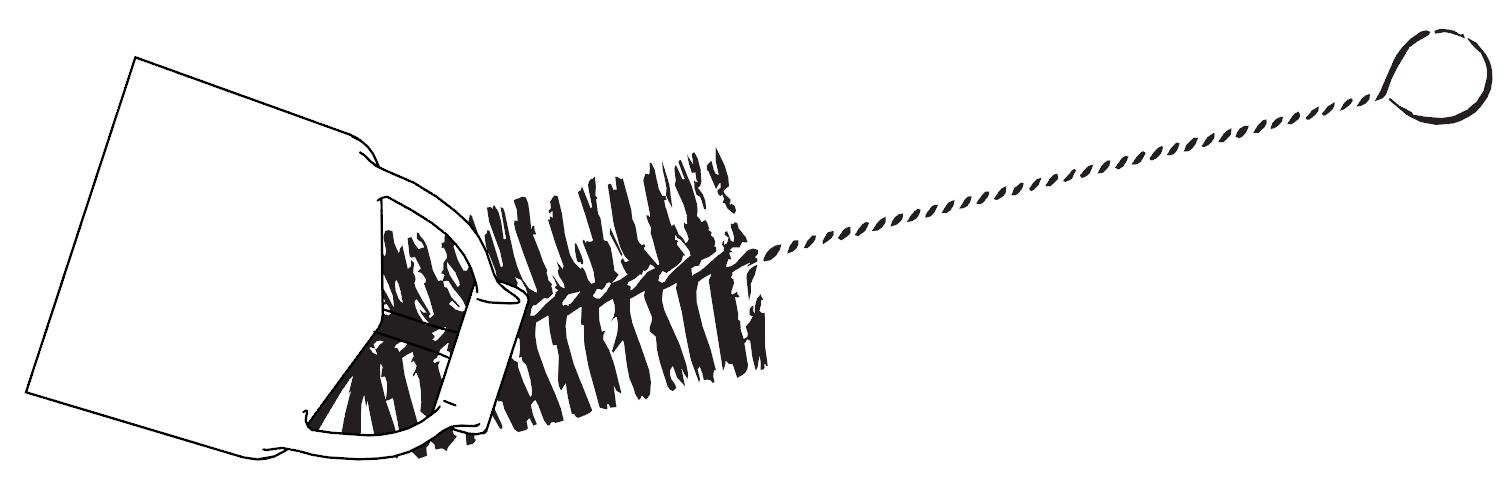
After Every Use
Give
ATMOS a light scrub with the included brush, making sure the holes and grooves are
clear. The bottles should also be cleaned thoroughly with detergent, and rinsed
well. Dishwasher Safe.
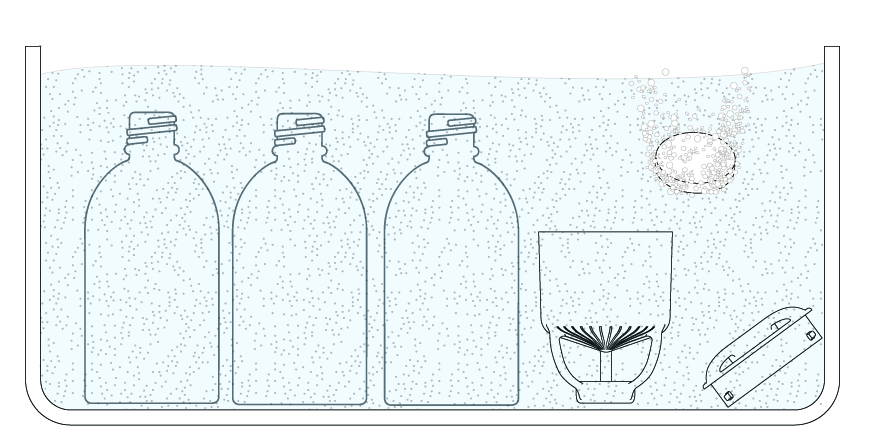
After Extended Use
1. Dissolve one sachet of descaler in a tub of
hot water.
2. Place ATMOS and bottles in the solution.
3. Ensure all parts are
fully submerged.
4. Leave to soak for 15 - 30 minutes or brush until clean.
5.
Rinse thoroughly (at least twice) in fresh water after soaking.
6. Do not leave the
descaler solution to dry on ATMOS as this may
cause discolouration. Wash hands /
gloves after handling product.
Bean Storage
How you store your
coffee, before and after grinding will affect the speed and flavor too. It's best to keep
your coffee in an airtight container and grind it just before use. Some people like to use
vacuum coffee canisters to remove the air and humidity during storage.
Coffee not collecting into the bottle
Check that the grooves are smooth and free of obstructions like coffee grounds or dirt.
Check that your kitchen bench, or surface you are using is level. Find a level surface.
If your drips are flowing too quickly the grooves may not work correctly as they are designed for a slow drip rate. See Check the Drip on adjusting drip rate.
Wetting the grooves before starting the brew can also help increase the capillary action, making sure your coffee ends up in the bottle.
The flow does not start
If the coffee does not contact the tamp water may not be drawn through the holes in the tamp. Increase the amount of coffee in the basket.
Check that the water from the top bottle is flowing into the tamp. If not, try unscrewing the top bottle a few millimetres to allow the water to flow into the tamp more easily.